


This is a reader-supported site. When you buy through links on this site, I may earn an affiliate commission. Thanks for your support! 🙂

I’ve been experimenting with two new recipes for weatherproof paper mache clay.
Note: We had a vote, and we’re now calling this new recipe “Paper Cement Clay.” Scroll down below the article to see updates on this post, and to see sculptures that have been made with the recipes. 🙂
I should have done these experiments way back in 2013, because that’s when Warren Eggleton wrote a guest post for this website. He showed us how he made his giant pots using a version of our paper mache clay recipe, with the addition of Portland cement.
The last time we heard from him, his pots had been outside for six years, in Australia.


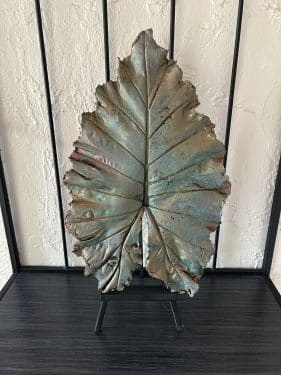
- I recently made a casting of a leaf with this mixture.
- And I sculpted a garden toad to go on the leaf. The new sculptures will be left in my garden over the winter, to see how well they hold up
- And there is now an update video, after the garden toad spent most of a Minnesota winter outside. So far, he seems to be doing OK, but it may depend on the climate and the product used to seal it. Be sure to do your own experiments.
I made some changes to Warren’s version of weatherproof paper mache, just to make sure every batch comes out exactly the same.
I also created two different recipes. One of them contains all the usual ingredients for paper mache clay, but the flour is replaced with Portland cement.
The second recipe leaves out the drywall joint compound, because it’s hard for some people to find.
I tested both of my new recipes by spreading small samples onto cardboard every 30 minutes, to see how long we could continue to use them before they stiffened up too much.
The mixtures will eventually get hard in the bowl because of the Portland cement, but I was able to continue using them for at least 3 hours, with the room temperature at 76° F (24.4 C).
Warren told us in his post that it will get stiff faster in warmer weather.


Test pieces for weatherproof paper mache clay recipe with drywall joint compound.

Test pieces for weatherproof paper mache clay recipe without drywall joint compound.
How the two recipes are different after they dry:


The texture of the recipe that includes the drywall joint compound is smoother – you can see that in the test piece on the right in the image above. However, for an outdoor sculpture, the difference may be so small that it really doesn’t matter.
Try the recipe that you think you’d prefer, and put your sculpture out in the garden.
After it’s been out there for a few months or a year, please come back and let us know if the rain, snow or sun has caused any noticeable damage.
Weatherproof paper mache clay recipe with drywall joint compound:
Note – be sure to watch the video at the top of the page to see how the ingredients were measured and mixed. If you want to make a larger batch, you may want to mix it with a paint mixer attachment on an electric drill.
Mix together:
- 1/2 cup drywall joint compound (200 grams)
- 1/2 cup Elmer’s Glue-All PVA glue (130 grams) Note – will not work with DAP or Würth brand joint compound.
- 1/2 cup damp toilet paper or recycled paper*
Mix until there are no lumps of paper in the mixture. Then add and mix well:
- 1 cup Portland cement.
*To see how to weigh the damp paper, watch the video on this page, starting at the 3:06 mark. You’ll need to scroll down the page to find the video. If you don’t have a kitchen scale, soak the paper in hot water, then squeeze out most of the water (but not all of it) and use 1/2 cup of the damp paper.
Weatherproof paper mache clay recipe without drywall joint compound:
Mix together:
- 1/2 cup Elmer’s Glue-All (PVA glue)
- 1/2 cup damp toilet paper or recycled paper*
Mix until there are no lumps of paper in the mixture. Then add and mix well:
- 2/3 cup Portland cement.
More experiments needed!
Warren had great luck with his pots outdoors in Australia. But I can’t know if these recipes will work here in Minnesota until I make a sculpture and leave it outside to see how well it does in our crazy weather.
In fact, we all need to consider these experimental recipes until we’ve had a chance to try them ourselves, in our own climate.
If you experiment with one or both of the recipes, please come back after a few months and let us know how they worked! 🙂
Related Posts:


Some of the projects readers have made with this recipe for paper cement clay:



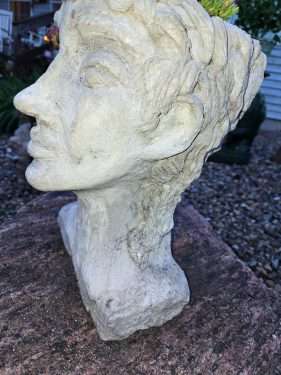




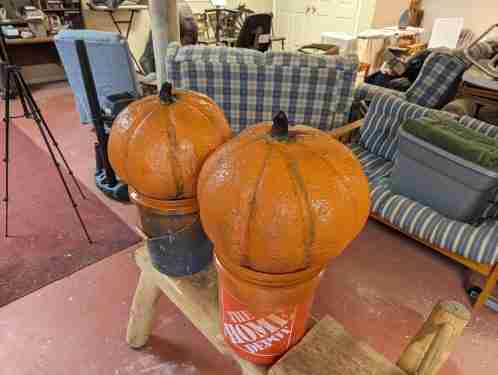



Hi Jonni, do you know the weight of the paper cement clay ingredients in grams by any chance? I live in Europe and don’t have any American measuring cups. Thanks so much for posting these “recipes”. They are much appreciated. I did a course in traditional clay sculpting, but in the end the clay and esp. the firing of the pieces became too expensive to continue. This material makes it feasible again
1/2 cup drywall joint compound (200 grams), 1/2 cup Elmer’s Glue-All PVA glue (130 grams). But if the proportions stay the same, you don’t really need to weigh the ingredients. Just use a small container you have, and it will work, even if it isn’t exactly the same same size as a U.S. cup. But remember that PVA glue won’t work with DAP or Würth brand joint compounds. Have fun!
The formulation looks AMAZING!
Can it be coated onto a cardboard or cardstock folded 3d form?
It might work, but I haven’t tried it. Cement and concrete do allow water to seep through, so if you make something with paper on the inside, it will get damp. For some projects, that might be a problem, especially if the cardboard is what’s holding the sculpture together.
Hello,
Thank you for your reply and the info.
Is that the process that is shown in the images of animal masks on your page?
What is the structure made of that is then coated with the weatherproof paper cement?
I don’t use the cement-based recipe with the patterns, which are made with cereal box cardboard. I use paper strips and paste, or paper mache clay. You can find the recipes on this page. I’ve never made a pattern for a sculpture that would stay outside for long periods of time, but any paper mache mask can withstand a little light rain if you spray it with varnish. The only thing I’ve made with the weatherproof paper cement is my little toad, which I made with an armature of crumpled foil. You can see the toad here. Other people have a lot more experience with this recipe than I do – I can’t lift the large bags of Portland cement, so I stick with my inside paper mache projects.
Relevant question
I wouldn’t necessarily use cardboard. When youTube suggested her dragon template right after I watched several videos of the paper-concrete-clay series including the making of the toad with the aluminium foil body, I imagined a hollow structure with wire and mesh like the steel construction in skyscrapers.
You could use wire and mosquito mesh for windows or Faraday fabric consisting of synthetic and metal compounds (the m² costs appox. $10)
Also plastic divider for folders comes to mind. You can cut them with scissors, punch holes, and sew and glue them, almost like paper, to create your body. Since plastic dividers are smooth and the material may slide off, roughing it up and providing loops on critical areas may be wise.
At least in my mind, this works like a charm. The principle is the same as with the dragon template made from paper, just swap it with something that is weatherproof.
Excellent advice – thank you so much for sharing. 🙂
I’m having troubling mixing everything and not getting lumps. I am using a mixer like yours when mixing it. Any advice of how to smooth out the mix more? Thank you!
Are you using the recipe that includes the premixed drywall joint compound? Some brands cause lumps when mixed with Elmer’s glue. One other thing that will sometimes cause lumps is squeezing out too much water out of the paper after it’s been soaked, or not soaking it long enough to let the paper fibers fall apart. And one person told me that she used a special toilet paper intended for septic tanks, and the fibers never mixed in correctly. Could it be one of those things?
Can I use homemade glue instead of Elmer’s for the paper mache cement clay? I use Debbie Chapman’s glue recipe
Hi Tara. I haven’t seen Debbie’s glue recipe, and I’ve never used home-made glue with the weatherproof recipe on this page. We do use a version of home-made glue for indoor paper mache clay, as you can see in this post. If you experiment with Debbie’s recipe with the outdoor paper cement clay, please let us know if it works.
9/11/25
Hi Jonni,
I’ve been using your Receipt for over 10 years and want to thank you for all the fun and pleasure it has gifted me! At 94 I’m beginning to slow down a little but am planning another project using the ‘outdoor receipt’! I’ve mostly used the Original Receipt in conjunction with gourds as armature, and lastly adding mosaics to finish.
Several of our projects have been Texas State Fair Entries and have come home with a Ribbon! Thanks again for sharing your genius! Evelyn Spires, Cleburne, Texas
Hi Evelyn. I’m glad you’re enjoying the site and recipes. And congratulations for earning those ribbons!
Can you tell me how long this clay is good for once it’s made up?
The cement in the recipe makes it harden in just a few hours. Make small batches that you can use right away.
Hi Joni!
I just want to thank you for sharing your recipe for your paper mache you use for your art. Some artists don’t like to share their secrets. I love knowing a tried method that works from a trusted source. I too like to share what I have learned and has worked best for me and pass it along to teach others. Your recipe has inspired me to make so many different projects. I am working on a fairy castle at the moment and I can’t wait till it is finished. I want you to know that I will be telling everyone about your website and to follow you for more information on paper mache techniques and where to find the recipes I have been using. Happy creating!
Thank you, Kristi! I’m very glad that you’re enjoying the recipes, and that you’re sharing them. 🙂
Jonni, thank you for sharing all your experience. I’m thinking of putting your cement paper clay over a life size aluminum foil project. Of course this will take a long time because I am a slow sculptor. Can new clay be added to clay that has already hardened? The project will stay indoors so would regular paper clay work better. This piece will be in a historical museum so I would like to feel certain that it will last maybe even for decades. Thank you
Hi Aleda. I’m not an expert with cement products. Since your project will be in a museum, you might want to consult with someone who has a lot more experience with concrete than I do.
I know the original recipe for paper mache clay will last for a very long time, if it’s kept dry. My first pieces were made 17 years ago, and they haven’t changed at all. Paper mache clay dries very hard, so it isn’t easy to damage. You might want to make two test pieces – just crumpled balls of foil covered with a thin layer of the paper mache clay on one, and the paper cement clay on the other. After the first layer dries, try adding more material, to see if you like the way it works. Then you can choose the one that you think would be best for your final project.
You solve integrity issues with pre-planned hooks, loops, mesh inlays, wire pins, and the like, that are exposed, thus giving additional elements something to grab onto.
I wonder if this could make a decent bird bath! I’m just concerned with exposing birds to certain chemicals in the drywall compound (though the drywall compound would probably contribute to the waterproofing?)
Hi Jay. The joint compound is not waterproof by itself, but you might want to use the recipe that doesn’t use the joint compound. I don’t know if anyone has tried this recipe for a project that will hold water all the time, so you should consider it an experiment.
How did it go with the birdbath?
I’d love to try this recipe to make one as well if it works
As a contractor and hobbyist, may I suggest:
USG Sheetrock, Brand, 25 lb. Durabond 90.
It is interior/ exterior. Mix well. It is identifiable by the color of the bag: BROWN.
You can find it in any box big chain store. I am about to do a paper mache exterior Christmas project for a friend and yes! I am going to use this product. I live in cold Minnesota.
Key word: exterior. I hope this helps.
Thanks for the info!!
All the best. ?
Thanks, Sharon – I had never heard of that product. I’ll be sure to check it out next time I go to town. I hope you let us see your Christmas project when it’s done! 🙂
Hi Sharon, I am starting to test this recipie and just read your post, could you explain why Sheetrock is the best? I appreciate your reply. Best, Meri
Thank you for sharing
You’re welcome. 🙂
Anything i put outsideb i cover well with a couple coats of polyurthane and have stuff thats been outside for several years.
Note…if it sets in a place that stays wet part of the time you’ll need to recoat items at least yearly if not a little sooner. Ive found sitting items on a rock/ brick/ block or flower pot dish helps it not to start softening so quickly. I live in NC we have mild winters but plenty of rain almost year round. If paint lightens up. Definite sign needs resealed.i use a brush to put poly on or a spray can. Be generous with it need to seal every nook and crannie.let dry between coats. If small object can dip item in container of poly and use wire to hang let excess drip into container and fully dry at least 24 hrs before redipping. Hope this works for others also. If know better ways let me know. Poly isnt cheap but i like it as a sealer! Have fun everyone. Enjoy your crafting! I have 2 soda bottles and paper mache snail planters i polied inside the plant area also. They been outside on my steps for 5 years i know and ive resealed them once during that time and people are still telling me they are so creative and durable where did i learn to make plastic or what did i make my plastic from isnt that dangerous and toxic lol.that lustrous shine also looks plastic like for a good while.ive also covered extremely small projects and little painted rocks with hot glue. Surprises me the sun hasnt melted it right off them or my garden bunnys hot glue right ear. The whole thing broke and i just used hot glue to make another. It gets flimsey and soft but not melted away! Who knew! Ill try anything at times!
Thanks for your very informative comment, Ginger! 🙂
Hello, which drywall joint compound did you used? I found that there is lots of types
(Two-component, Acrylic, Silicone, Polyurethane,…) so im confused whitch one should i get 🙂
I just used USG Sheetrock brand pre-mixed All-Purpose joint compound. You can use any brand except DAP or Wurth, and one of the recipes works without any joint compound at all. Remember to look for drywall joint compound – they make joint compound for pipes, too, and that’s not what you want.
Joni
I have to make smaller batches because I am a detail freak and I am too slow to use a batch before it starts to harden … SO … I have figured out that I can mix up a big batch of the paper, glue and dry wall compound in the correct proportions and keep it in a big air tight container. Then I just take out a portion the size I need and add cement to the right consistency. OR I can add the corn starch, oil and flour to make paper mache clay … 🙂
Great idea, Dorores! Thanks. 🙂
I have made a big batches of paper mache clay, put it in in a joint compoud bucket and put it in the freezer or fridge and It always has worked for me
Thanks, Patricia. I’ve had some good luck with that method, too. 🙂
Love this!
bonjour
2 questions
je ne trouve pas du ciment Portland un ciment ordinaire peut il etre utilisé
que veut dire sceller le modele
I think that Portland cement is ordinary cement. Try what you have available, and see what will work. Your local DIY store should have a suggestion for a spray sealer that will work for your project.
I use wikipedia to decipher US products by calling up the US page and changing the language to mine (German)
Portland cement is the most common cement there is, according to the wikipedia page. So any common cement in your country will likely do.
drywall joint compound is German Stuckgips or Spachtelmasse, though I needed to call up the English page for gypsum first. I have since learned that the Würth product has issues in this mixture, which is a big German company. So the most popular brand in your country may not be the best choice.
Stuckgips is gypsum optimised for sculpting ornament. It is likely the one best suited for this mixture. So check for ornament gypsum first before testing other brands.
Sorry that I couldn’t provide the best French option or equivalent. My French is not good enough for a deep dive into the subject.
But the methodology should work nonetheless.
Is it necessary or ok to use a cement seal after the project is completely dry? Thanks
You do need to seal it after it’s dry. 🙂
Jonni requested ideas for less messy mixing for cent clay I had no idea where and how to connect to any of you here’s what I do Hope you all will try it use a 1galion zip lock bag Put all the dry ingredients into it Including the paper blended up fine Dump the wet ingredients on top zip it shut knead in the bag works great Next I’m going to roll in the bag too if I can get back to you I’ll let you know the method
Great idea, Mabel – thanks! 🙂
Just found you yesterday, so lots of questions. I am looking for a weatherproof clay that can be used like earthenware (potters) clay without having to be fire cured. With potters clay, you can roll it out into a slab, cut it into shapes and use those smaller slabs to hand mold an object.
I want to build odd/irregular shaped bird houses ( think of those fancy gingerbread houses you see at Christmas) that will withstand the weather. I’m an engineer and retired mixed media artist working in wood,steel,glass, and clay. I see a lot of applications for cement clay that can be worked in slabs like potters clay.
Hi Perry. I don’t know if this recipe for paper cement clay will work for that purpose. If you do some experiments with it, we’d love to know how they turned out. I have no expertise in cement myself, so anything you can tell us would be great. I really like the bird house idea. 🙂
Did you eventually find out about the weatherproof clay? I am making an irregular shaped miniature witch house and I want to make miniature clay tiles…Thank you
Karleen Thornhill, Greyton, South Africa
Yes, the toad and his leaf are still doing just fine. You can see the update here. Let us know how it works for you – I don’t know if anyone else has tried it in South Africa, so we’d love to hear back from you. 🙂
Curious if you found a recipe for slab building with cement. I’m thinking of trying Pal Tiya Premium. I have a couple of slab projects for outdoors (luminerie).
I haven’t tried anything like that, but I know the Pal Tiya product has excellent reviews. If you try it, please letus see what you make. 🙂
I didn’t have much luck with any of the recipes ya’ll suggested. However I did figure out how to build my birdhouses out of thin concrete. The basic idea is to use a heavy fabric that has been soaked in a thin concrete slurry. Then drape over a mold/model/object to create the shape you desire. As it dries, add layers of the slurry to build thickness and strength. The trick was finding the right slurry mix. I’ve kind of forgotten the exact product names, but basically you soak the fabric in Portland cement, then with each additional layer you add sand to the mix. I settled on what they call the base or brown coat stucco mix you find at building supply.
I have pictures but don’t know how to post them here.
Hi Perry – I love the idea of using the fabric and cement for birdhouses. In fact, I could use some birdhouses, myself. I do hope you’ll post some photos. You can do that on the Daily Sculptors page.
The leaf in Jonni’s video is proof positive that you can create slabs with it. For better integrity of the slab, you can add a layer of mash inside. Outdoor window mosquito mesh is flexible, durable, and can be cut to size with scissors. If you also provide loops of strong nylon (fishing lines) or wire, you can get the joints in any angle you desire.
Thus, you can build any sculpture or birdhouse you can imagine because any new layer has something to grab onto, whether the dry material provides support or not.
Another method to join dry elements with new wet elements is to provide grooves. Take a fork and make grooves in the area where new elements are planned. leave them rough. The more irregular, the more grip. Just make sure not to trap air gaps that may collect condense water and burst the next frost period.
Hi Joni, what recipe of the two did you use for the toad?
Hi Berrni. I used the first one, with the joint compound.
Hello!
I’m not sure if I’m doing something wrong, but whenever I soak the sculpture, I am able to just pull it apart when I take it out of the water (and if I scrub it, it wash away some of the sculpture, too). I let it cure for four days; is that just not long enough? It looked dry (like in the video) and I even put it in a heated drying box. It is also somewhat easy to break the dried clay without even putting it in water.
I made quadruple sure that I used exactly the same ingredients as you (same cement, too) and used the weighing method for the paper.
Thank you for any advice!
How big is the piece that you’re making, and how thick is it? If it’s thicker than mine, it would take a lot longer to dry. That’s the only thing I can think of – that maybe it just didn’t have a chance to get dry and cure all the way through. I hope someone else has a better explanation for us. You might try asking on the Daily Sculptors page, too – maybe more people would see your comment, and someone might know what went wrong.
A note of caution regarding Portland Cements..Here, in Australia…the description for the right stuff is Portland Cement GP (‘General Purpose’) a similar cement is described as “Builders Cement” this has fly ash Pozzolan substituted for part of the Portland. The result is a far slower cure, so is useless in this particular application. Check twice that you are buying Portland Cement GP! Of further note, I’ve found that “Ivory White” Portland cement, (apart from being preferred for pigment tinting), also exhibits a faster set than grey (American gray) Portland Cement.
There are products specifically created for Portland Cement work…Since the 50’s Australia has Bondcrete (A Modified PVA for external work) and from the same people Silasec (A water proofing accelerant for Portland Cement). Portland Cement is caustic when originally mixed. So’ If trialing fibres to produce composites, note that standard glass roving staples for fibreglass will weaken in a PortCement Mix (Saint-Gobain stock a short glass fibre staple that lives happily with PortCement, another fibre that works with PortCementComposite is Hemp Fibre.
Thanks, Peter. 🙂
Yes, i found out the hard way that portland cement ( ie pool plaster) is caustic. My replastered pool was not acid washed enough in post filling and as i ran my fingers along the seat of my spa, my fingers were burned. two months later, when my fingers are wet, i can still see the circles from the damaged skin layers.